Writing your first python program with 主播视频+先锋影音ntroller and Havi MicoPy
A challenging question posed by curious Vaikunth to Sneha led to a wonderful (and much needed) discussion and debate between kids. Which finally resulted in a wonderful explanation about Microcontrollers for kids, by their teacher.
This blog brings microcontrollers into action. I mean we will discuss…
1. How to give power supply to a microcontroller?
2. How to connect basic sensors and output elements with a microcontroller?
3. How to program and which programming language should be used for microcontroller?
And for us a microcontroller means 主播视频+先锋影音ntroller. True, there are popular microcontrollers like Raspberry Pi, Arduino, Microbit and ESP32. Then what’s special about the 主播视频+先锋影音ntroller?
主播视频+先锋影音ntroller is specially designed for kids of age 10 years onwards. Key benefits for 主播视频+先锋影音ntroller are:
– No soldering and no jumper wires required.
– Great built quality.
– Supports python language as well as arduino C++.
– Built with ESP chipset, gives it more power then arduino.
– Inbuilt wi-fi and bluetooth.
All these together makes 主播视频+先锋影音ntroller a perfect microcontroller for kids and adults alike.
This blog provides a step by step explanation of building your first project with 主播视频+先锋影音ntroller.
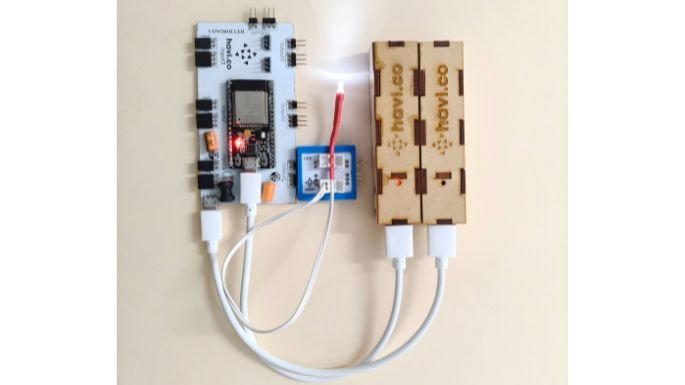
Power supply for the 主播视频+先锋影音ntroller
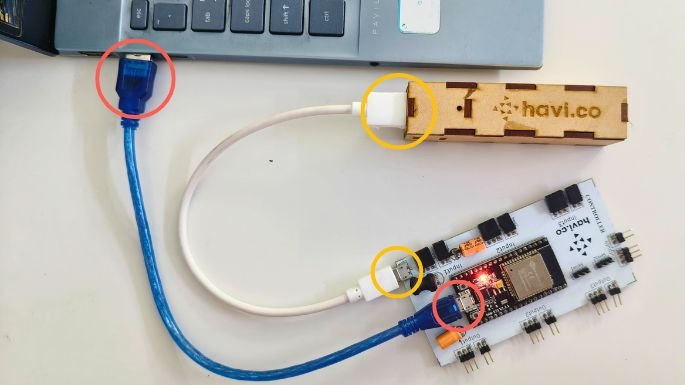
There are two power supply plugs in the 主播视频+先锋影音ntroller.
1. One on the main board (white board)
2. The other on microchip
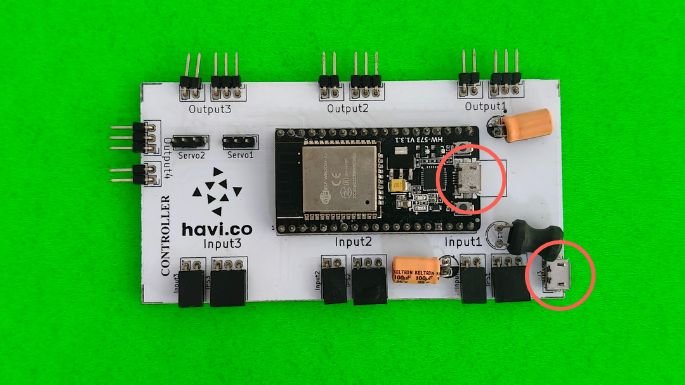
And you need to provide power supply to both.
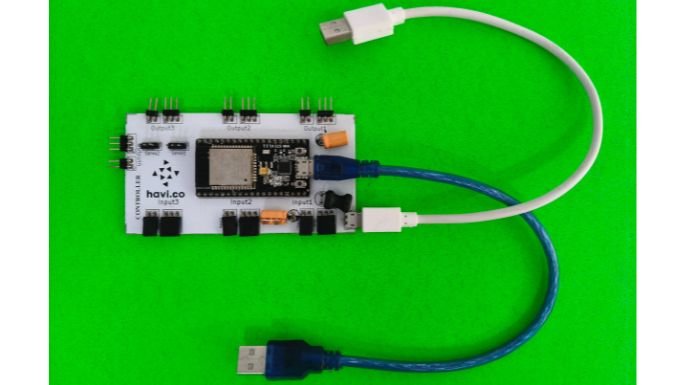
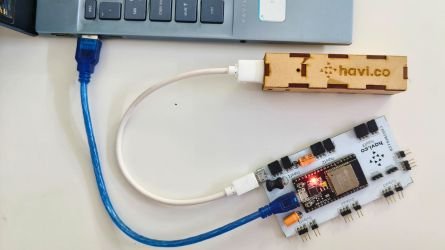
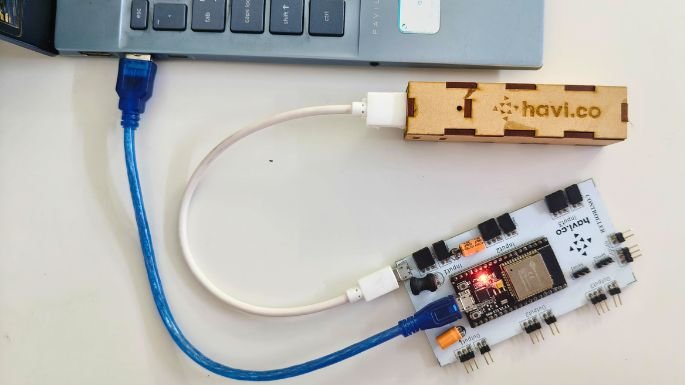
1. When you are programming, connect your laptop/PC usb port with the plug on the microchip, using USB data cable.
2. Connect the plug which is on the main board with the power bank or charger pin or usb port of your computer.
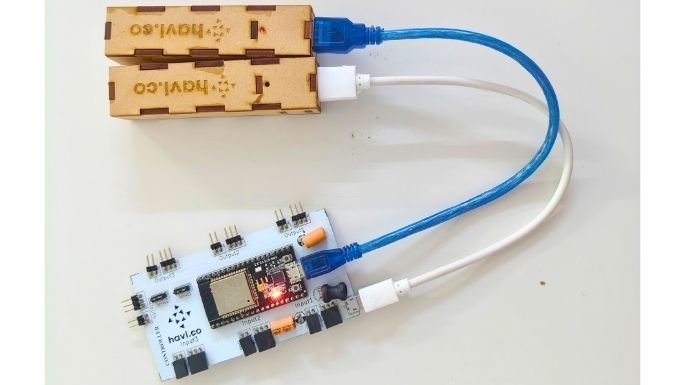
3. When you are not programming, but executing your project, you need to keep giving power to the microchip and main board both, either through a power bank or a charger pin or a computer.
Writing your first program on 主播视频+先锋影音ntroller
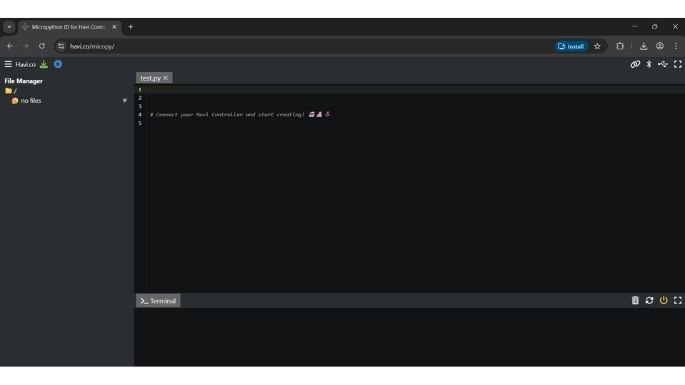
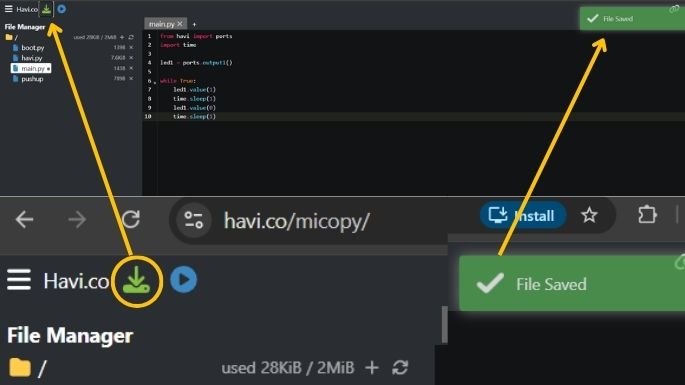
Open Havi MicoPyin your browser. Havi MicoPy is a free online python editor for microcontrollers.
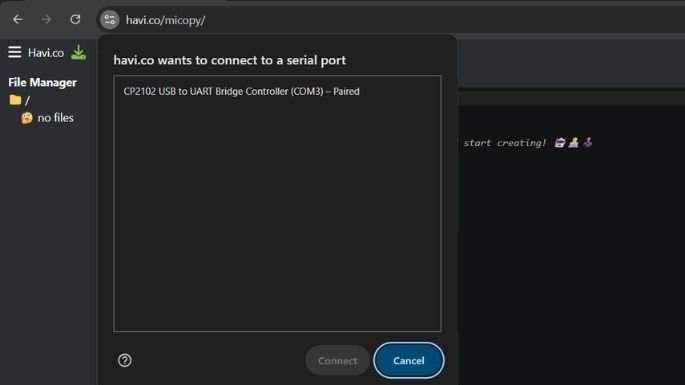
Find the USB icon at the top right corner and click on it.
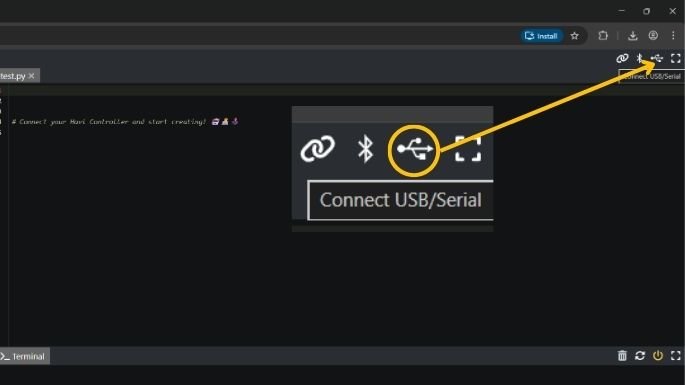
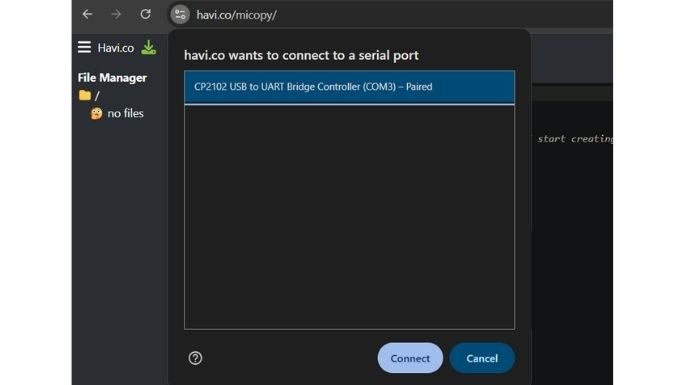
You will see a dialogue box showing available devices. Click on your 主播视频+先锋影音ntroller board and click the button connect.
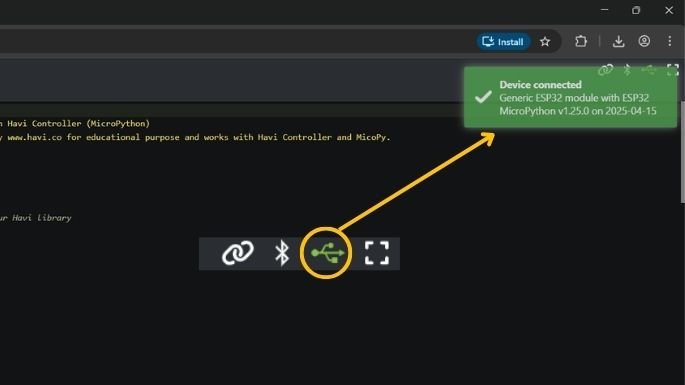
The USB icon at the top right corner turns green.
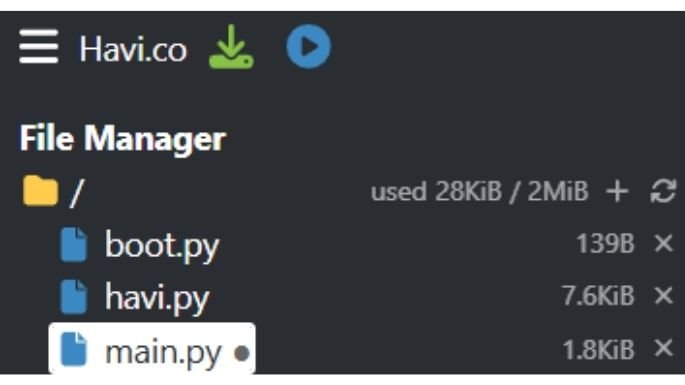
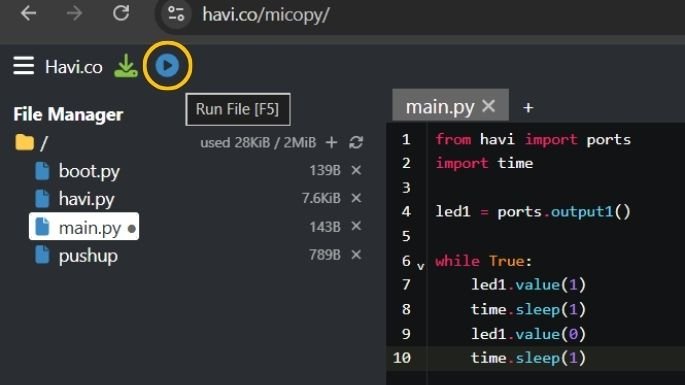
If you are using your board for the first time, you will see the following three files in the file explorer on the left side.
1. boot.py – keep it as it is, nothing to be done with this file.
2. havi.py – keep it as it is, nothing to be done with this file.
3. main.py – you write your program in this file. In other words, all your code should be in this file.
A controller can have only one copy of each of these files at a time.
Let’s write a first basic program to make your LED blink at a specific time interval.
Prepare the circuit first.
Either create a new main.py or use the existing one, and copy the following code in that.
import time
led1 = ports.output1()
while True:
led1.value(1)
time.sleep(1)
led1.value(0)
time.sleep(1)
Click the save button at the top left corner.
Click the run button at the top left corner and you will see your LED linking. YOU DID IT!
Backup of your code
When you are preparing to write another program for your 主播视频+先锋影音ntroller, you definitely would want to keep a backup of your existing code. You can do this in following ways:
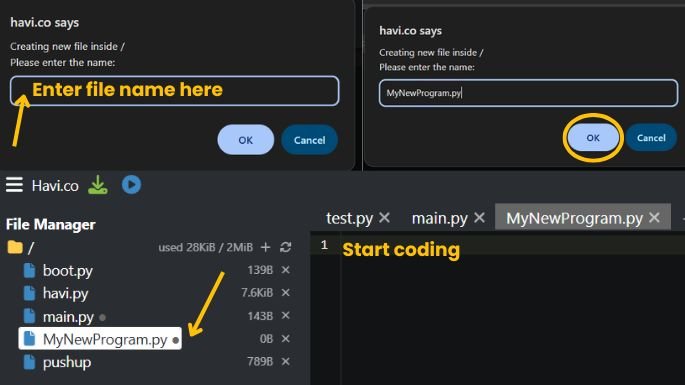
1. Rename the main.py, that means your current code, to something else, for example smart-dustbin-project.py
2. Then create a new main.py file by clicking the + sign in Havi MicoPy. Give it name main.py

3. But remember that keeping files for backup in a microcontroller is not an ideal way, in fact it’s risky. You may lose your code.
4. So you should keep a backup of your files by keeping a copy in your PC or cloud storage like google drive.
That’s how you write and execute the programs in 主播视频+先锋影音ntroller and make a variety of STEAM projects in robotics, IoT, AI and various other disciplines.
Keep creating.